DMA234 – The Leonard Cohen Experience
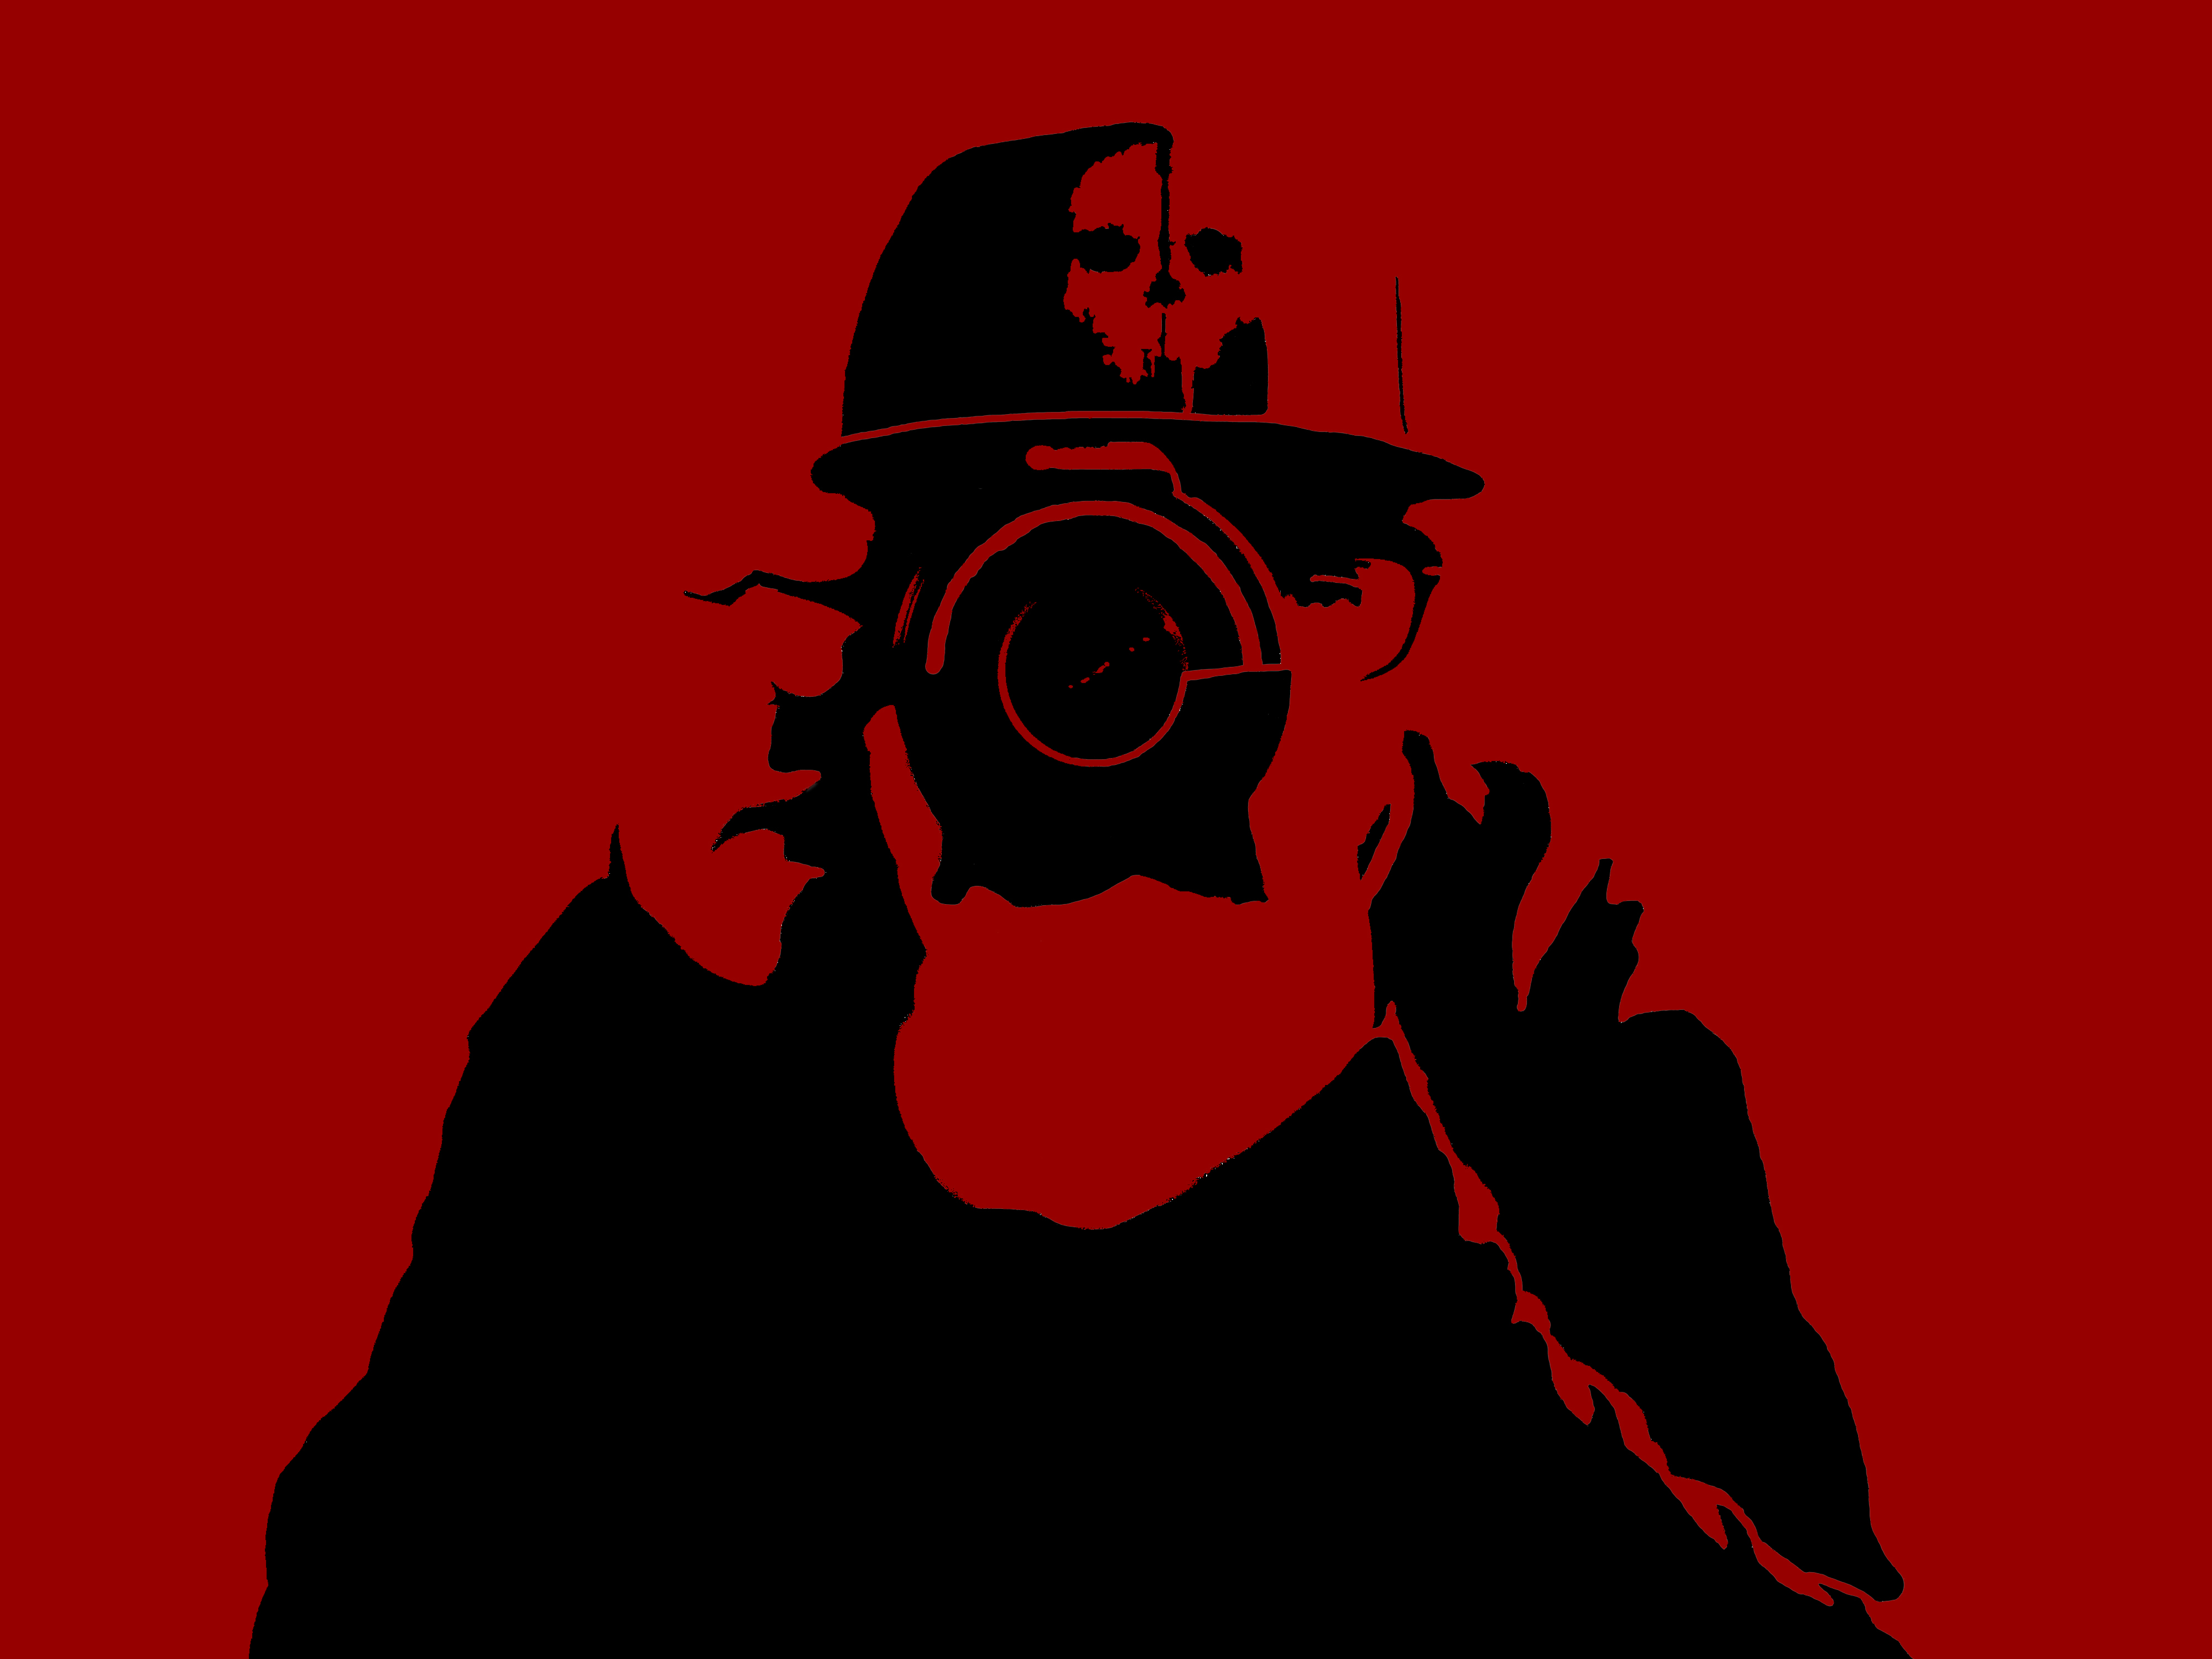
 I think he looks better now. Like an actual man. (Using healing brush tool to merge an old man features to a young man)


This is the final sound assignment for my Sound 1 class. Was made in Protools using only my voice and one reverb sound effect. Thought it turned out really funny so im uploading it here. Hope you guys enjoy it.
Thanks to the rest of the group for helping. Bethany, Joe and Nate.

Here is my finished skateboard design. I’m pretty happy with how it turned out. I will explain how I got to this finished product below.
At first, this was the route I was going with my skateboard. More down the graffiti path. I used the same photographs as I did for my original Charizard edit idea but added in the graffiti picture you see in the background of the picture in the top right. Fiddled with the opposites till I got that. Oh and added in my logo.
This crap you see here is what I ended up with when it came to the finished board at first. I threw the picture on the board’s frame and realized the picture gets far to pixilated when I stretched it out to fit the board. To make up for it I just put the picture in the middle and used content aware fill to take care of the sides. It didn’t work out perfectly so I went over it a few times with to get what you see. Thew on my logo and was ready to print.

When I had some extra free time due to being ahead of the curve when it came to my assignments I went over my old finished skateboard design and realized it was dog shit. So I looked into ways of changing it. In the end, I understood I had to start over with my base image. To stick with the 60s,70s,80s, theme I looked at some of Andy Warhol’s work and wanted to go down that route. I also wanted to incorporate the Darkster colors (black and red) This was done simply using the paint bucket tool and then doing light touch-ups with the brush.
From that point, I threw the images on to the 10×36 canvas and arranged them how I wanted. Used the brush tool to pull the edges of the black and red across the canvas and used the paint bucket tool to fill it in. After that, I added in my logo. I couldn’t find a place I really liked to put it so I decided on just putting it right in the middle and having it work like a negative against the background. Did that again with just the brush tool and then filled it in with the paint bucket. Lastly, I added in DarksterMedia in the top left. I tried mirroring it but I didn’t like how it looked. Way too many letters. Then tada! Finished.

OMG!!! ITS HAPPENING!!!!! MY BODY IS READY!!!!
I ended up dropping the whole Charizard skateboard idea because of this whole copyrights infringement thing. Who would have thought its illegal to steal other peoples work? so to keep it safe I decided I’ll just use a self-portrait. Only I own me.
In class, we saw this video about graffiti and these little dot lights things that got really popular with street artists. I was somewhat inspired to have a go at graffiti myself after watching this. I wanted to incorporate a camera into it in some way since the photo video side is what I like the most when it comes to the DMA course. I looked around for photographer, cameraman, camera stencils and couldn’t find anything I liked. So I made my own. Here is a link to the tutorial I used to help me get started.
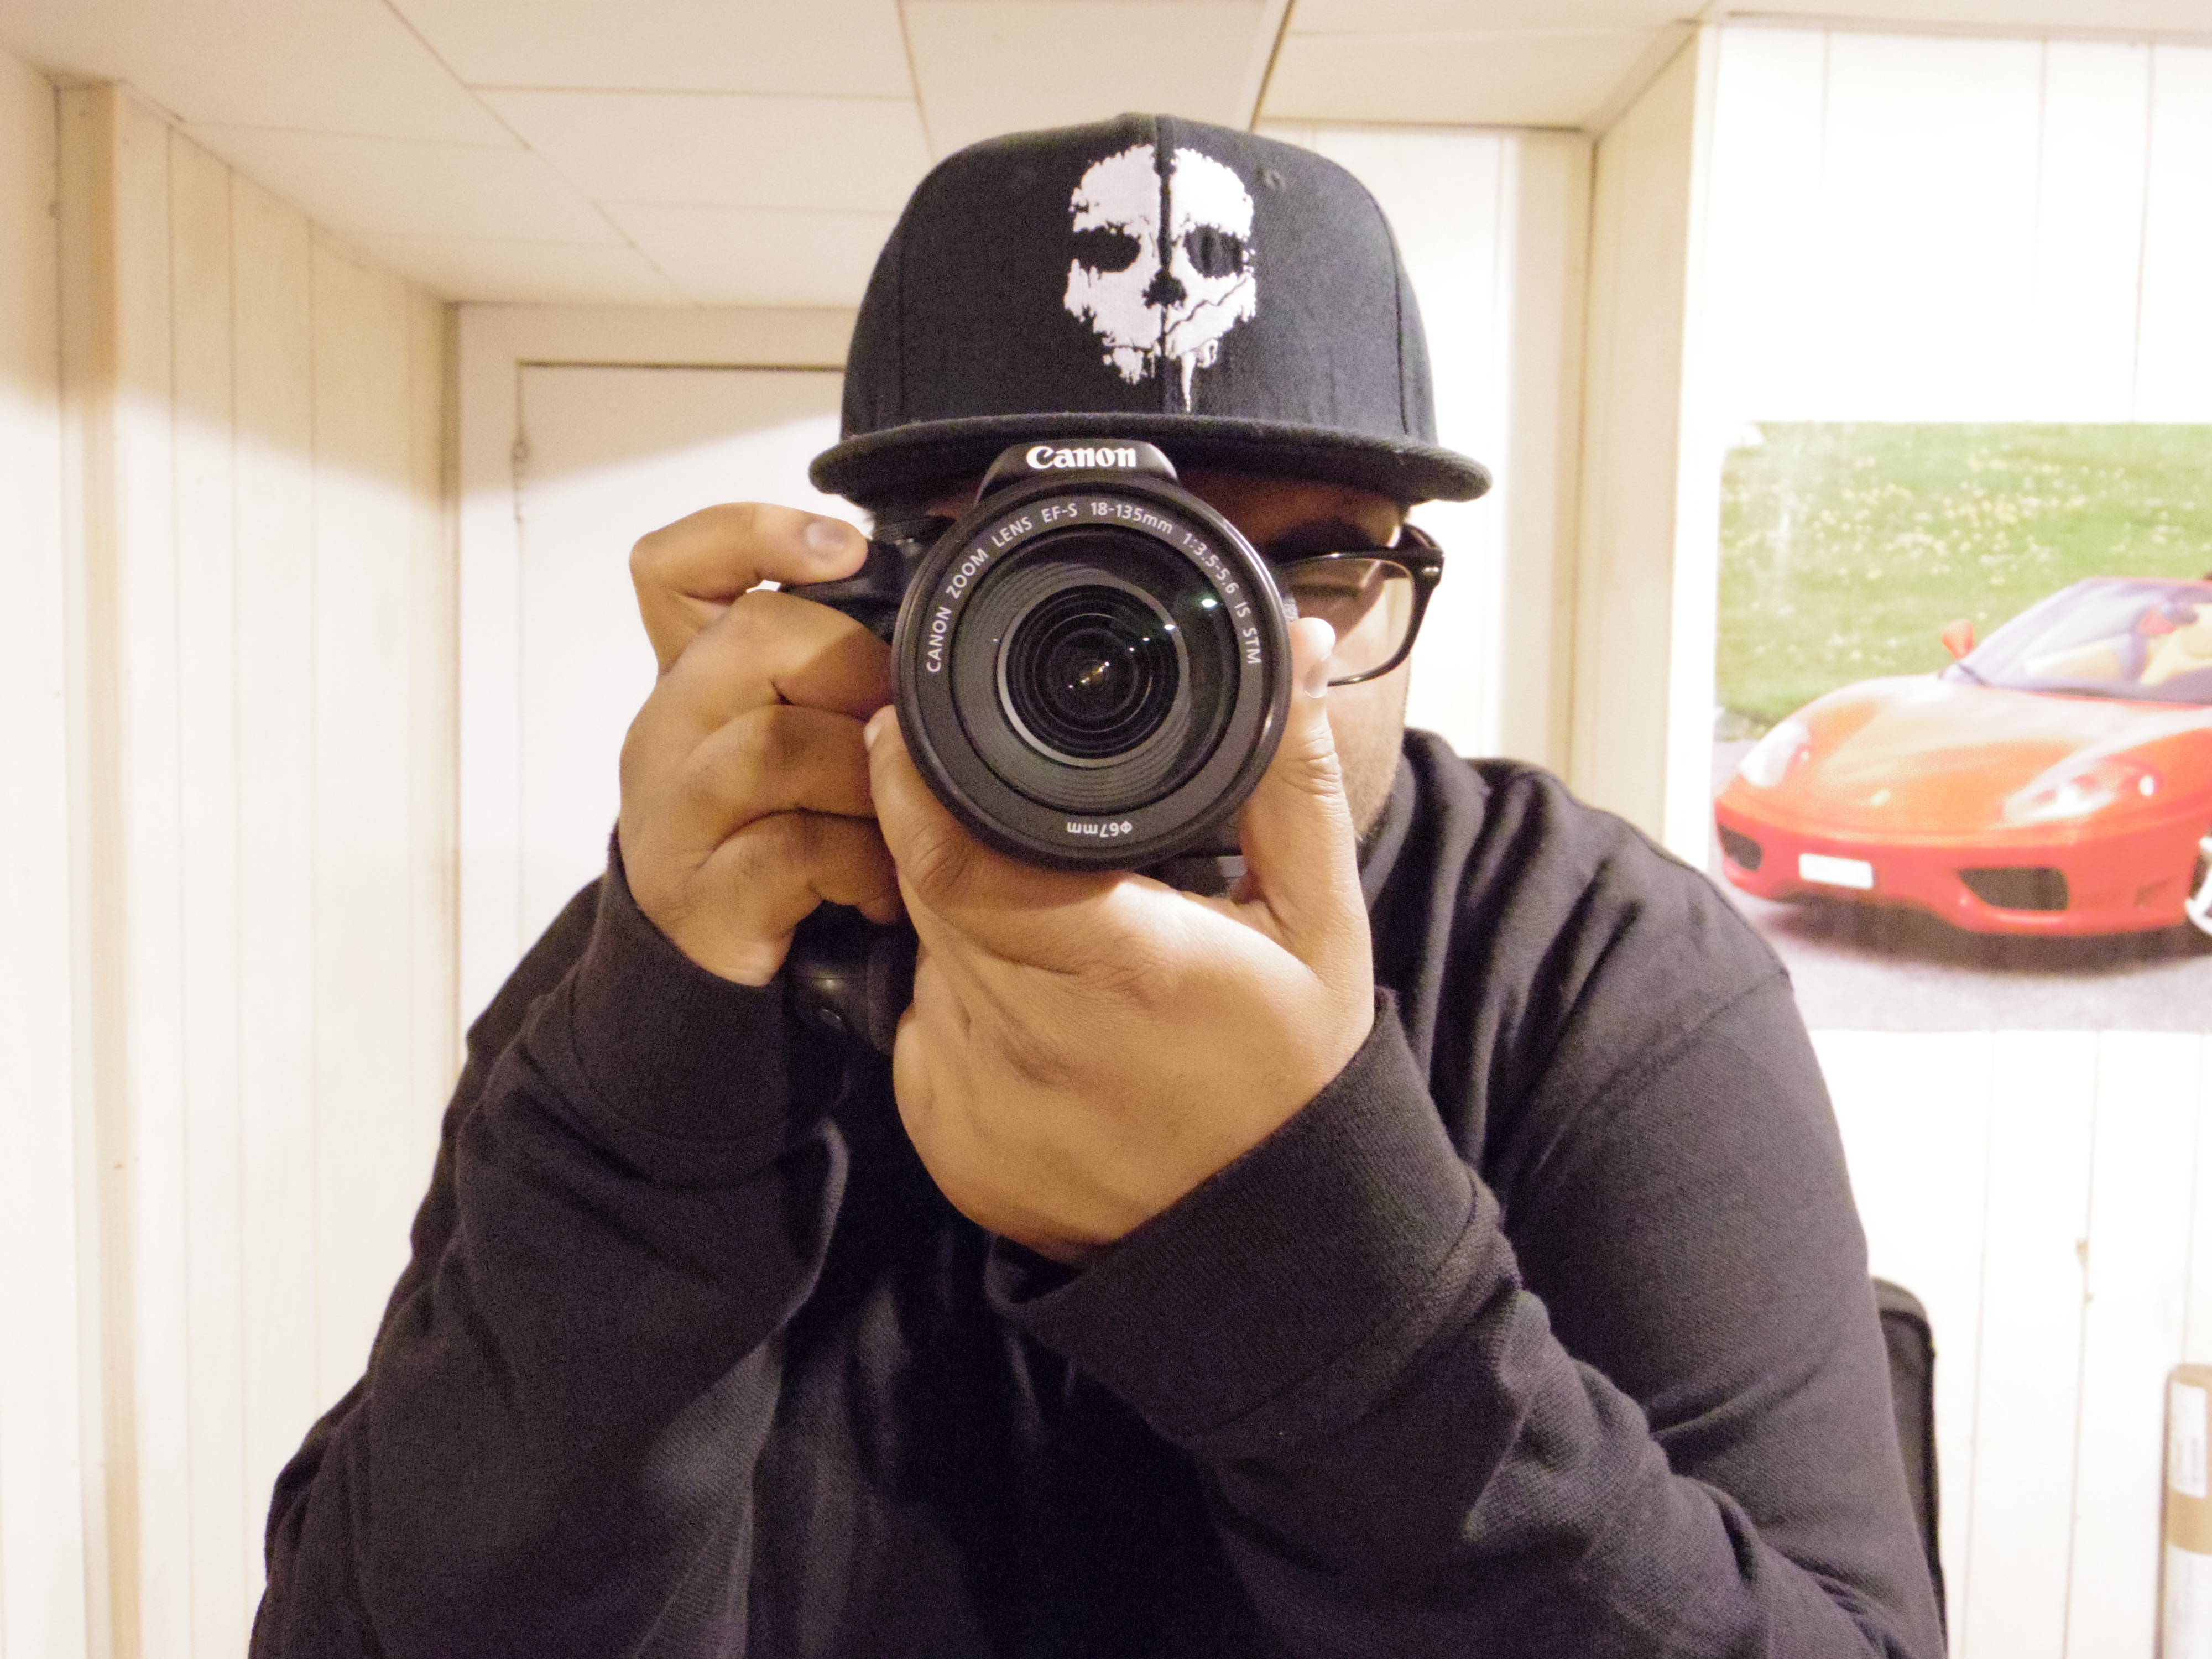
I started with taking the self-portrait. Used a tripod and 2 cameras. One camera to hold and 1 camera to take the picture. It took a few tries to get it how I wanted. The camera I’m holding is the Canon T5i with a battery grip and an 18-135 lens. The camera that took the picture is the Pentax Q7 with the 02 Standard Zoom 5-15 lens. The Q7 was set to auto and a 12-second timer. I also wore black because I didn’t want any extra detail once it got to the final image after editing. This is also my first time doing this and I didn’t want any random situations happening because of what I was wearing.
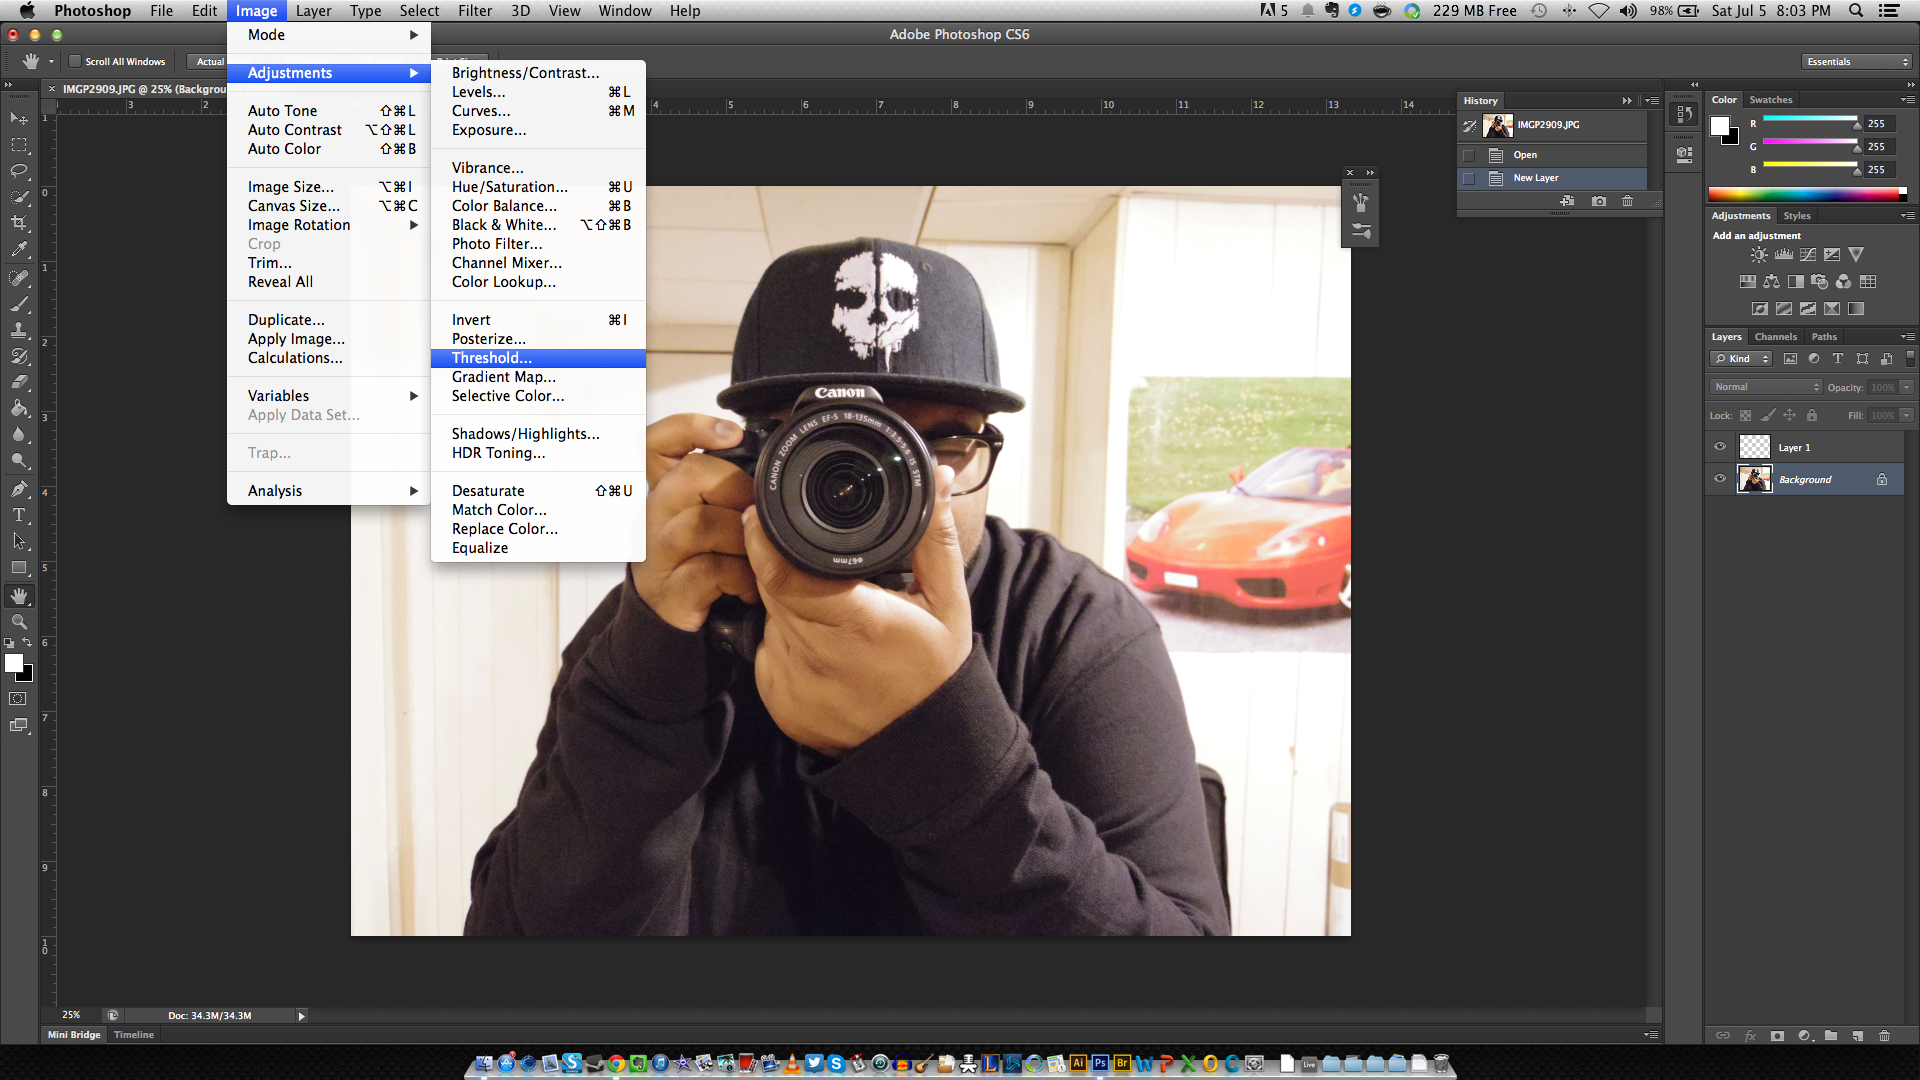
To get that solid black and white look all you need to do is throw your picture on Photoshop and go to (Image – Adjustments – Threshold) You can then tweak the level of intensity after you click into that. You can see that bellow.

I had it set to around 116 but if I was going to do it again I would drop it to around 96. I found myself taking out allot I wouldn’t have needed to bother with if I had gone with a lower threshold from the beginning. If I had to give one point of advice that would help you in doing this I would say the more solid and fuzzy the better. That being said again this is my first time doing this so that could be completely wrong. Your results may vary.

Here is the finished product. It took me about an hour and a half but if I was to do this again, in general, I think I can get it done in under 45 minutes. One thing to remember is to add bridges that somehow lead out to the white. The reason for this is because you will be cutting out all the black you want the spray paint to be on. If you cut out any black that has white you want in the finished product then you messed up. I don’t know if I did it right here but it looks as close as I can tell. I really won’t know till I start cutting or applying paint. I might just skip the whole graffiti part and mess around with some saturation’s and some images to get the skateboard project done. I’ll see how time and the end result comes out and decide from there. Hope this helped and thanks to marcusthorpe for the tutorial.
DMA179DA – Super Morlock Adventure Quest (Friday, May, 30, 2014)
^^^^^^^^^^^^^^^^^^^^^^^^^^^^^^^^^^^^^^^^^^^^^^^^^^^^^^^^^^^^^^^^^^
^Link to Flickr Above^
This is an assignment for my DMA179DA class worth 15% of our final grade. The assignment is to get into a group of 5 or more and go on this adventure scavenger hunt. (Down Town Toronto Canada)
I demanded that our group be called TDT – Team Darkster Top. I’m not sure if it was agreed on. No one else brought up any names so we are officially Team Darkster Top!
TDT Members, Nate (The Carry),Beth (The Support),Joe (The Jungler),G (The Mid), and lastly Me the King of Top
Photos shot on the Canon T5i with the 50mm EF F1.8 II and the 18-135mm EF F3.5-5.6 STM
All selfies and group selfies are taken on the HTC One M8
—-Presentation of the assignment—-
– Group project with groups of 5 or more ( feel free to teamup with other groups for the trip )
– Each group member must list each person on the blog in the group
– plan most of the day for this project
– Each group must have a “group name” for this assignment.
– Post photo’s to your choice of social media sharing sites ( each member must do this )
—-Required shot list—-
Photo’s will be used to document the groups adventure. Feel free to shot more Required photo list
– Photo of yourself heading out for the adventure
– Group photo of all members in your group on the subway
– 2 photos of advertisements inside the subway car
– 2 photos of warning signs on the subway platform
Get off at St. Andrews
– Photo of two group members getting a transfer
– Photo of the art on the sidewalk at King Street and Emily
– Photo of all members at a streetcar shelter ( with advertisement in background)
– Photo of Java’s Daily Specials street board ( west of Spadina on Queen south side )
– Photo of the Portland and Queen street signs
– Photo of the storefront of NewYork Subway ( try it out if you want no subs allowed )
– photo of the Gandhi sign ( hungry the best Roti in Toronto ! )
– 10 photos of Graffiti
– Photos of the old Silver Snail location
– Photo of the ‘robots’ on the wall at Active surplus
– Photo of some product one of your group members paid Active Surplus for. trust me someone will buy something
– Photo of a member looking at something from a street vendor on Queen Street ( and Soho ) Photo of the Black Bull patio
– Photo of Soho Street sign and street
– Photo of the Black Market signage
– Photo of the much music SUV out of the building
– Storefront of UMBRA ( check it out if you want )
– Photo of everyone getting on the Subway at Osgood
– Photo of someone’s business card on a subway seat
– Photo of everyone saying bye and heading home at the end of the day
